
Latitude Embedded Experience Setup
Authentication

Because the Embedded Experience is designed to be used in your own customer portal inside of an iframe, it is the responsibility of the consuming application to handle the authentication. This means before initializing the iframe, you should ensure the following:
- Your Embedded Experience host URL is the same host used in the standalone implementation.
- You are loading our embedded.js script in your application's header, and it is available on the page that will be mounting the embedded experience. Ex:
- The user is logged in and has access to the page.
- You have the user's ID available to send when getting your embedded experience authentication token.
- This would be the unique identifier in your system for that user's account
- You have an embedded experience authentication token retrieved using your normal Client Grant application credentials, which Brightwell has provided to you and the user's ID. This token is not a regular JWT but a specially encrypted token specifically for the embedded experience, so no client credentials or JWTs will be exposed on the front end.
- A div with the id of
latitude-paymentswhere you would like to mount the embedded experience.
Embedded Experience Example
Before rendering the page that will mount the embedded experience, you will need to get your embedded authentication token using your client credentials, your user's ID, and your Brightwell's implementation host address. You will then make this token available to the front-end of your page, along with the user ID. Below is an example of how this can be done. It is important that this code only ever runs server-side.
const res = await axios('https://api.readyremit.com/v2/oauth/token', {
  method: 'POST',
  data: {
    "client_id": "CLIENT_ID",
    "client_secret": "CLIENT_SECRET",
    "audience": "https://api.readyremit.com",
    "grant_type": "client_credentials",
  }
});
const token = await res.data.access_token
const encryptedTokenRes = await axios('https://api.readyremit.com/v2/oauth/embedded/token', {
  method: 'POST',
  headers: {
    Authorization: `Bearer ${token}`
  },
  data: {
  	userId: '[email protected]`
  }
})
const encryptedToken = encryptedTokenRes.data.token
Once you have your token and host available to the front-end, you will be able to mount the embedded experience properly.
Below is a complete example of how to mount the embedded experience in a NextJS application. Although the example below uses NextJS, the embedded experience can be launched in any application stack that uses JavaScript.
page.tsx
import axios from "axios";
import Head from "next/head";
import PageContent from "@/components/page-content";
import Script from "next/script";
import { Suspense } from "react";

export default async function Home() {
  const res = await axios('https://api.readyremit.com/v2/oauth/token', {
    method: 'POST',
    data: {
      "client_id": "CLIENT_ID",
      "client_secret": "CLIENT_SECRET",
      "audience": "https://api.readyremit.com",
      "grant_type": "client_credentials",
    }
  });

  const userId = '[email protected]';
  const token = await res.data.access_token
  const encryptedTokenRes = await axios('https://api.readyremit.com/v2/oauth/embedded/token', {
    method: 'POST',
    headers: {
      Authorization: `Bearer ${token}`
    },
    data: {
      userId,
    }
  })
  const encryptedToken = encryptedTokenRes.data.token
  // This should be the host of your stand alone latitude experience.
  const host = 'STANDALONE_LATITUDE_HOST'

  if (!token || !encryptedToken) {
    return <div>Failed to get access token.</div>
  }
  return
    (<div>
        <Head>
          <title>Page Title | My Refunds</title>
        </Head>
        <Script src={`${host}/js/embedded.js`} />
        <Suspense>
          <PageContent token={encryptedToken} host={host} />
        </Suspense>
    </div>)
}
pageContent.tsx
"use client"
import { useEffect } from "react";
export default function PageContent({
token,
host = `https://latitude.dev-pay.brightwell.com`,
}: { token: string, host: string }) {
useEffect(() => {
console.log("initing embedded experience")
window.LatitudePayments?.init({
token: token,
host,
})
}, [])
return (
<div id="latitude-payments"></div>
);
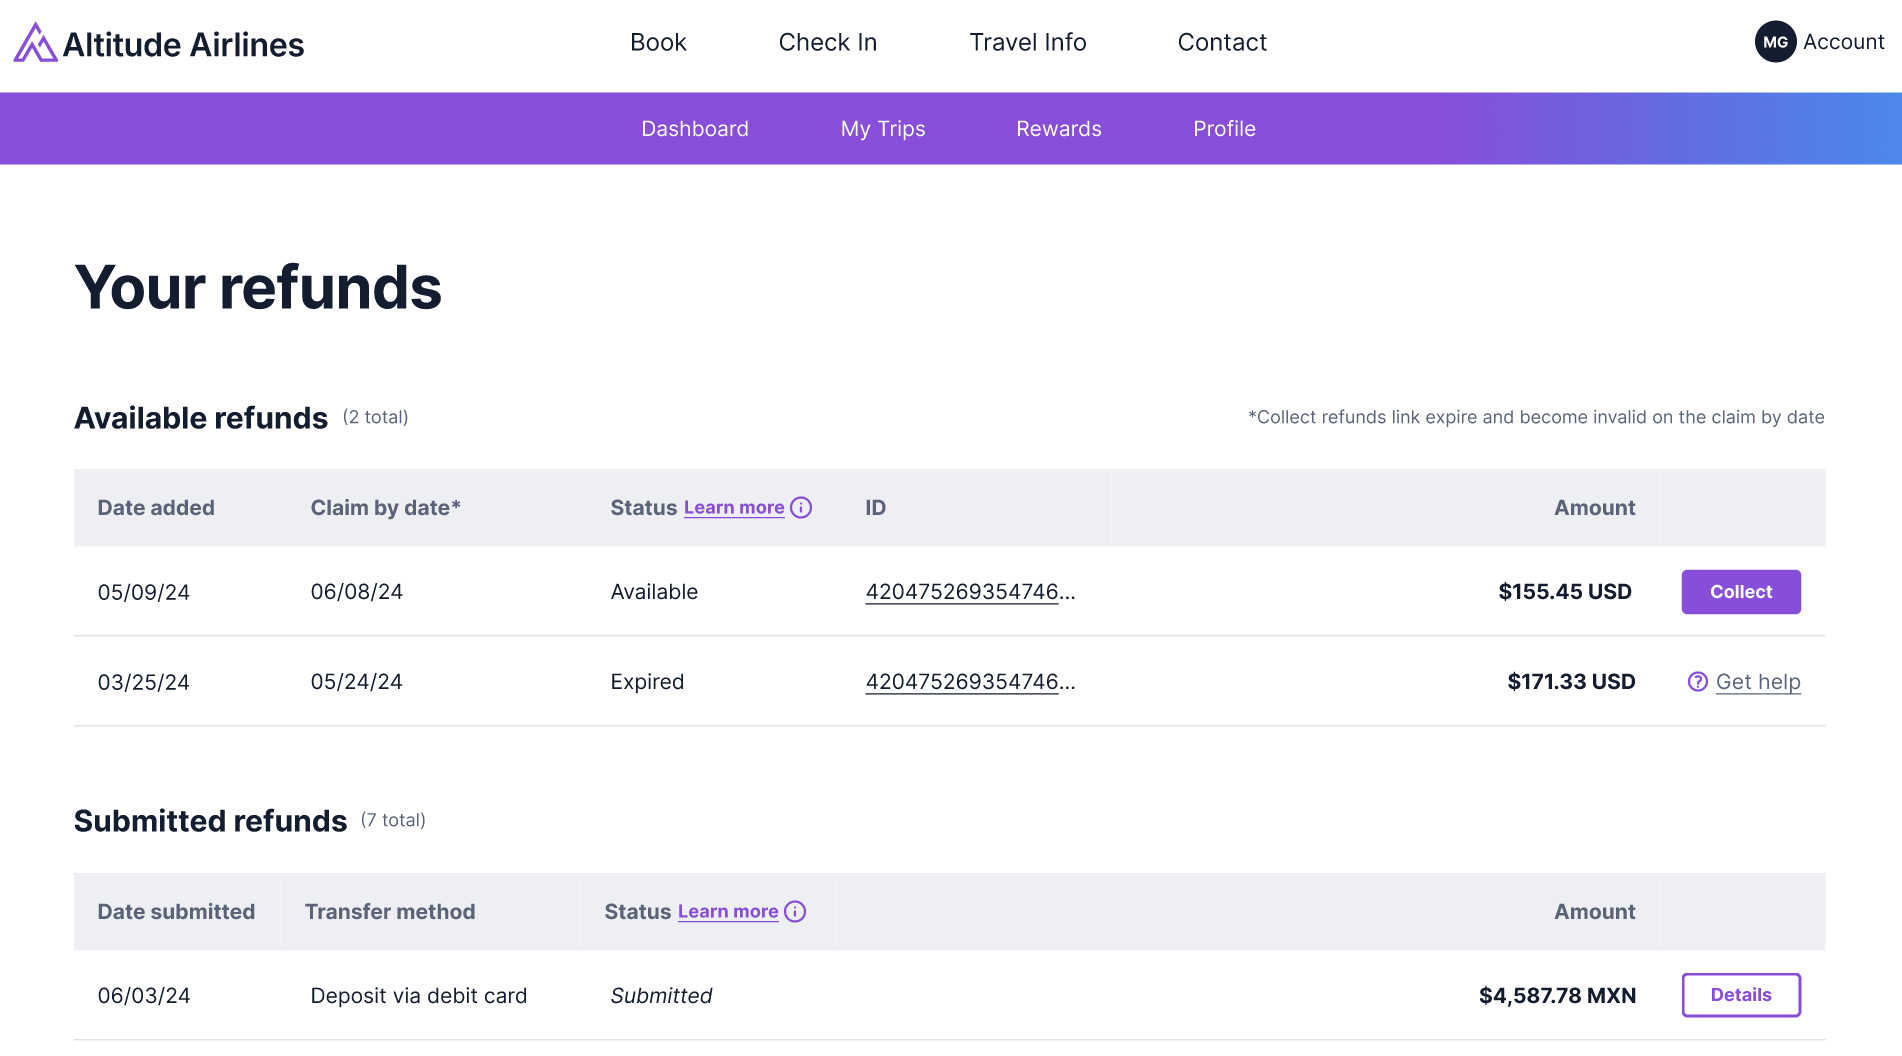
}If everything was configured properly, when this component is mounted Brightwell's embedded script will initialize the embedded experience and mount the user's refund portal inside the latitude-payments div you should see something like the image below:
❓FAQs
Q: What if the token leaks in the browser history?
A: The only token that will be exposed to the browser is our specially encrypted embedded token. This is not a regular JWT and can only be decrypted and used in our servers.
Q: Can we use refresh tokens?
A: As stated in the authentication section, because your application is mounting this embedded solution, the page being used is controlling the overall authentication to the embedded experience. That being said, it is recommended to keep your authentication tokens short-lived on the page mounting the embedded experience.
✅ What to Validate
- iFrame loads correctly for authenticated users
- Ensure your Brightwell authentication token used to retrieve your encrypted embedded token is not exposed in the front-end anywhere.
- Embedded Token is rejected when the experience tries to mount if it has been tampered with.
- iFrame rejects unauthenticated access
🛠 Tools
- JWT.io for decoding tokens
- Browser dev tools → Network tab to inspect iframe loading
- Console logs on both parent and iframe apps for postMessage events
📚 Summary
- Customer Site Backend: Handle the Authentication of the user and retrieve the Embedded Authentication Token
- Customer Site Frontend: Initialize the embedded experience using the embedded token, user ID, and host provided from the backend.
- Latitude Backend: Validate embedded token and serve embedded content
- Shared: Use secure communication & limited token scope
Updated 8 months ago